

|
|
 FAQ FAQ    Register Register  Login Login
|
Stripping RSVR Factory frame |
Post Reply 
|
Page <1 3456> |
| Author | ||
albrown001 
Premium Member Joined: 08 May 2013 Location: Dorset Status: Offline Points: 539 |
 Post Options Post Options
") Thanks(0) Thanks(0)
 Quote Reply Quote Reply
 Posted: 11 Feb 2016 at 19:04 Posted: 11 Feb 2016 at 19:04 |
|
|
No further pics yet
 I ran the bike today. For the first and second time I pressed the starter switch the bike popped and banged like a good un to the extent I started to question myself. On the third time it fired up and kept running. Idle was a bit low and the bike was just running rough. I kept it at high idle speed till the fans had cut in 3 times then everything seemed fine. I checked the engine for leaks but couldn't find anything. Harrah, epic win. Put the back wheel on and did some other stuff and then ran it up again. I think its good after a rebuild to run the engine and have the fans cut in a few times then let the engine cool down before starting it up again. I think the heat softens all the pipes and if you are going to get a leak it will be when you next start the bike. When I restarted the engine I got a coolant leak which I didn't have before so just nipped up the jubilee clip. Thing is I definitely found where a leak was and not to say I don't have another one elsewhere but all things being equal and not touched anything else I might have solved it. Going to run it up again tomorrow and have another good check on things before I finally put the fairing on. Also when it was hot I noticed that I got too much oil in there so going to suck a bit out tomorrow. I bought 2 new rivet links for the chain and obviously put them somewhere safe as I can't find them so can't put the chain on. So ordered a couple more. Epic fail. By the time the rivet links arrive I should be confident with the bike and it should be all together.
|
||
 |
||
|
albrown001
Premium Member Joined: 08 May 2013 Location: Dorset Status: Offline Points: 539 |
Post Options
Thanks(0)
Quote Reply
Posted: 11 Feb 2016 at 22:59 |
|
|
Yes it fcuking stinks it does. It made me feel sick. Bleaagh
 Cheers for the help earlier Mark. I dropped my air box and put a hole in it so ended up using the other one. Good job I had it. One thing I did notice when I was running the bike today was that throttle tamer. I noticed it straight away. When I had my bike and it had the flywheel weight still fitted I could stall the engine just by blipping the throttle. When I removed the flywheel weight it doesn't stall when blipping the throttle but you can still feel it if you give it a good blip that it just chokes the engine up. These engines are built for power and if you give it a good handful at low RPM the engine just stops. When I was blipping the throttle today its a lot smoother, it doesn't bog down. I can tell its much better and I haven't even ridden it yet, just by the blipping of the throttle. The engine spins up much better. It actually sounds and feels sharper than before with OEM throttle where the engine would hesitantly bog down. I don't think there would be any point in having it on a 4 cylinder as they are more linear power, if you get my drift. So think it would be a waste of money on them. As soon as I get it out for a ride I'll post how it rides compared to the OEM throttle.
|
||
|
||
|
badapple
Premium Member 
Joined: 03 Nov 2014 Location: Norwich United Kingdom Status: Offline Points: 5776 |
Post Options
Thanks(0)
Quote Reply
Posted: 12 Feb 2016 at 10:52 |
|
|
Absolutely awesome top job fella. Major sense of achievement I'd of been terrified putting it all back together again. Well done keen to see how it all feels on the road and just in time for spring.

|
||
|
I started out with nothing and I've still got most of it left
|
||
|
||
|
albrown001
Premium Member Joined: 08 May 2013 Location: Dorset Status: Offline Points: 539 |
Post Options
Thanks(0)
Quote Reply
Posted: 12 Feb 2016 at 16:40 |
|
|
Cheers m8, Only thing that is not on it now is the chain. Will have to do that on Monday when the rivet links arrive and if the weather is good I will take some pics. I ran it again in the morning and all seems good so put the fairings on. When I first looked at it the bike obviously looks different because of the frame. The more I looked at it the more I appreciated it. I think it looks really good. It was well worth the effort and the overall affect looks different and quite special. As soon as I get the chain on and a clear day I will take some and post some more pics Got this spare bolt though… Anyone got any ideas where it has come from? Its not from the front fastening of the air box. I checked that already. Open to any suggestions that anyone might have but I can't think where it has come from. Only thing that crosses my mind at the moment is it has come off the spare air box I had but I don't think it had a bolt in it. Well not one I can remember any road so think its off the bike.  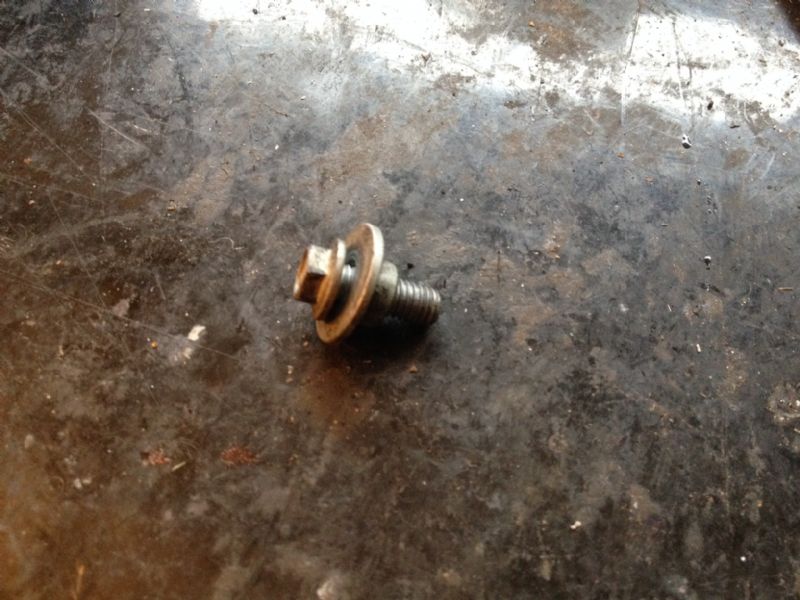 |
||
|
||
|
geobarb
World Superbike Star 
Joined: 23 Sep 2015 Location: greece Status: Offline Points: 223 |
Post Options
Thanks(0)
Quote Reply
Posted: 12 Feb 2016 at 17:47 |
|
|
It looks to me like the bolts in the tail section
|
||
|
||
|
geobarb
World Superbike Star
Joined: 23 Sep 2015 Location: greece Status: Offline Points: 223 |
Post Options
Thanks(0)
Quote Reply
Posted: 12 Feb 2016 at 18:06 |
|
|
Maybe ap8112600+ap8104879 that fasten the tail
|
||
|
||
|
albrown001
Premium Member Joined: 08 May 2013 Location: Dorset Status: Offline Points: 539 |
Post Options
Thanks(0)
Quote Reply
Posted: 13 Feb 2016 at 02:52 |
|
|
Cheers, I don't remember putting anything like that in the tail section. That must be where it is from then. I'll have a look at that tomorrow. Thanks

|
||
|
||
|
albrown001
Premium Member Joined: 08 May 2013 Location: Dorset Status: Offline Points: 539 |
Post Options
Thanks(0)
Quote Reply
Posted: 14 Feb 2016 at 01:02 |
|
|
Not out of the tail section

|
||
|
||
|
geobarb
World Superbike Star
Joined: 23 Sep 2015 Location: greece Status: Offline Points: 223 |
Post Options
Thanks(0)
Quote Reply
Posted: 14 Feb 2016 at 10:03 |
|
|
Hi,this type of screw is also for fastening the coolant reservoir
|
||
|
||
|
albrown001
Premium Member Joined: 08 May 2013 Location: Dorset Status: Offline Points: 539 |
Post Options
Thanks(0)
Quote Reply
Posted: 14 Feb 2016 at 14:25 |
|
|
Of course. Nice one. I think that is where it is from now but will have to check. My right reservoir mounting on the bottle is broken off because I have crash bungs and probably removed the bolt now as its not needed. But will have to check.
|
||
|
||
|
albrown001
Premium Member Joined: 08 May 2013 Location: Dorset Status: Offline Points: 539 |
Post Options
Thanks(0)
Quote Reply
Posted: 15 Feb 2016 at 18:03 |
|
|
Got my chain rivet links through this morning. Had to pop in to town and do some stuff round my Mum and Dads house so started a bit late on the bike. But couldn't resist posting the before and after pics, with a few others, although when I took the pics the sun was going down. But just could't wait… Its not spotless, but then its not a mantelpiece ornament.
Before 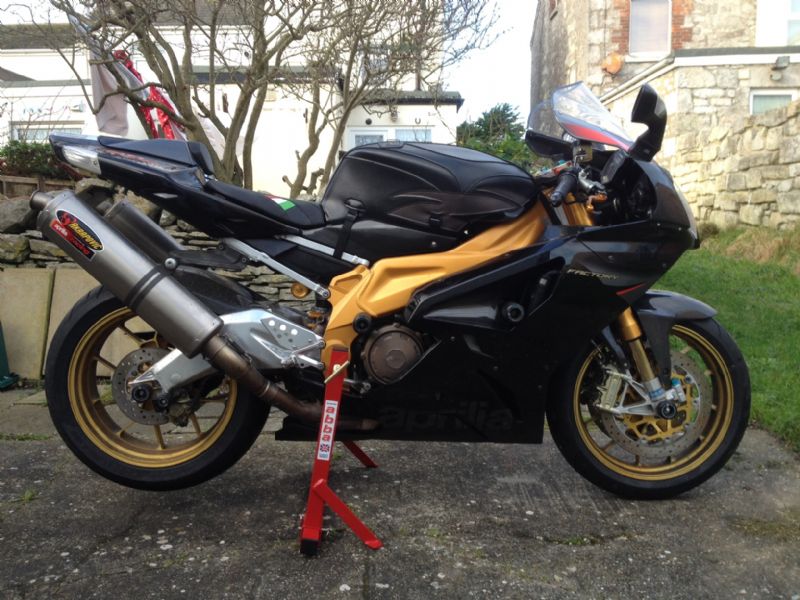 After  Few more pics from around the bike 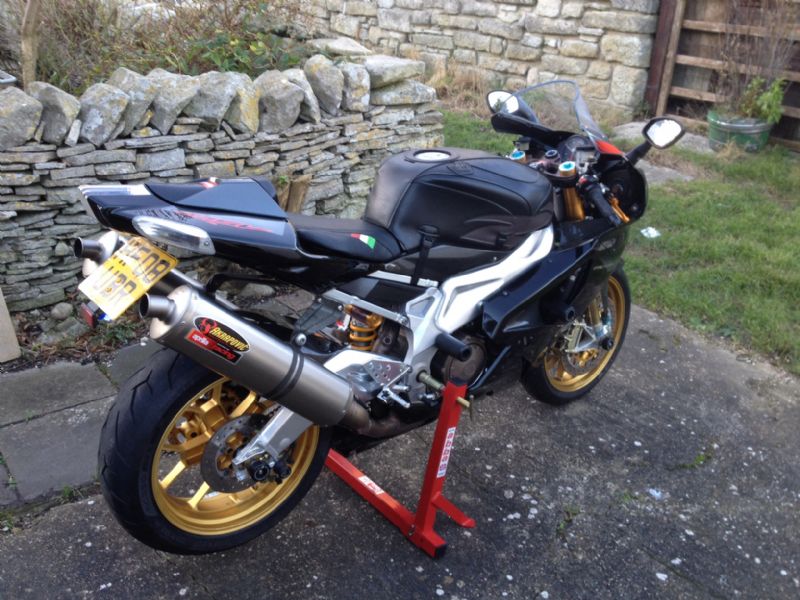 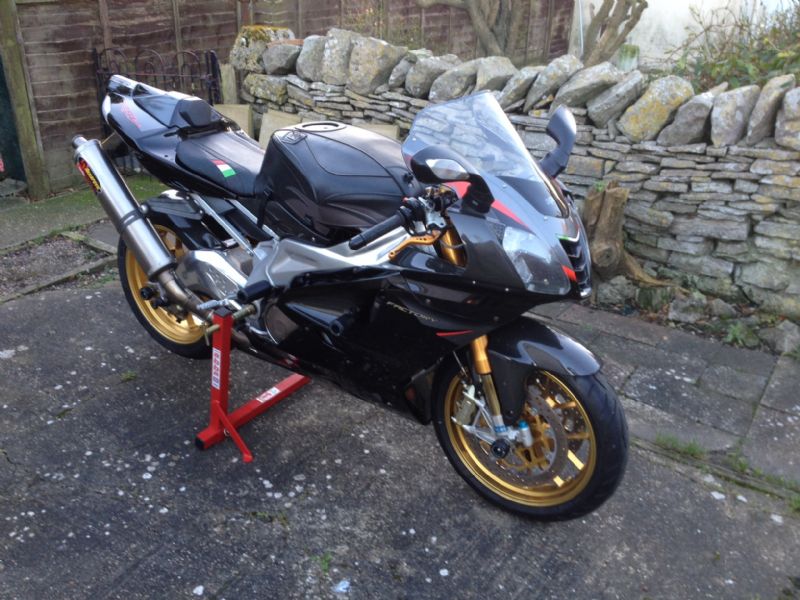 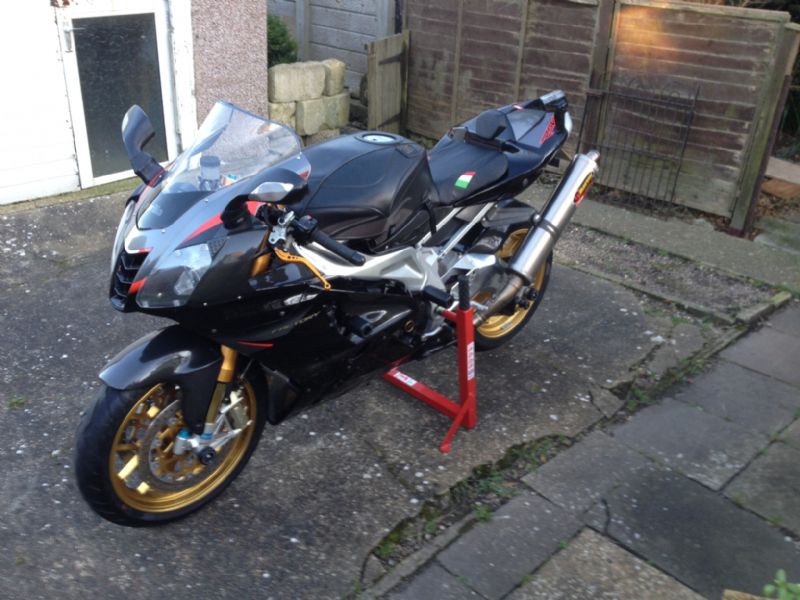 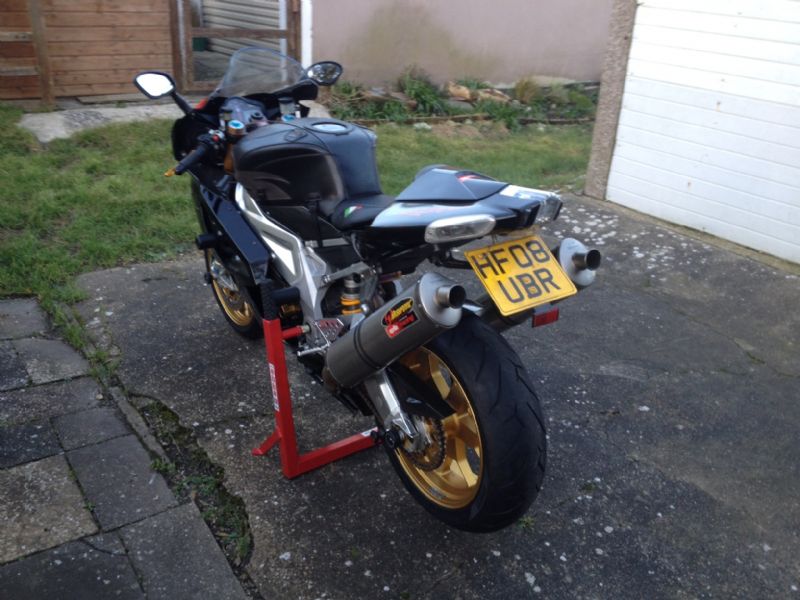 Some close ups 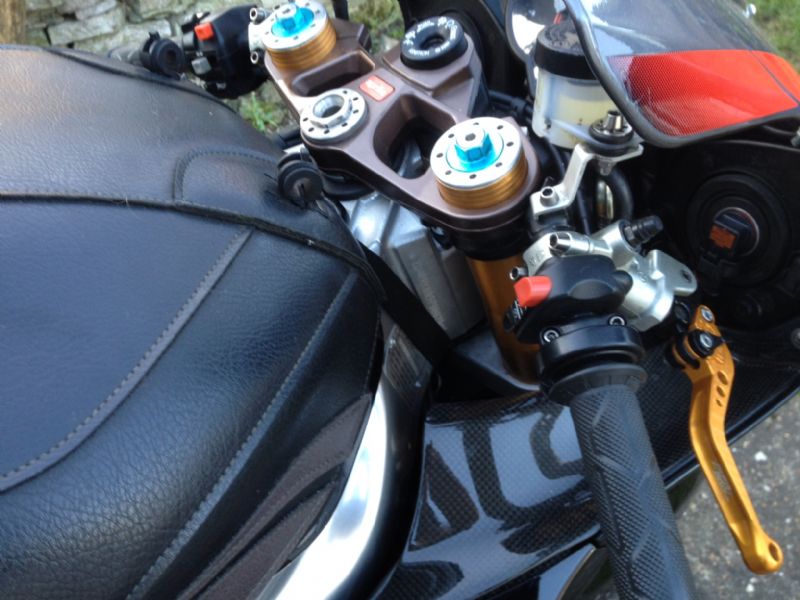 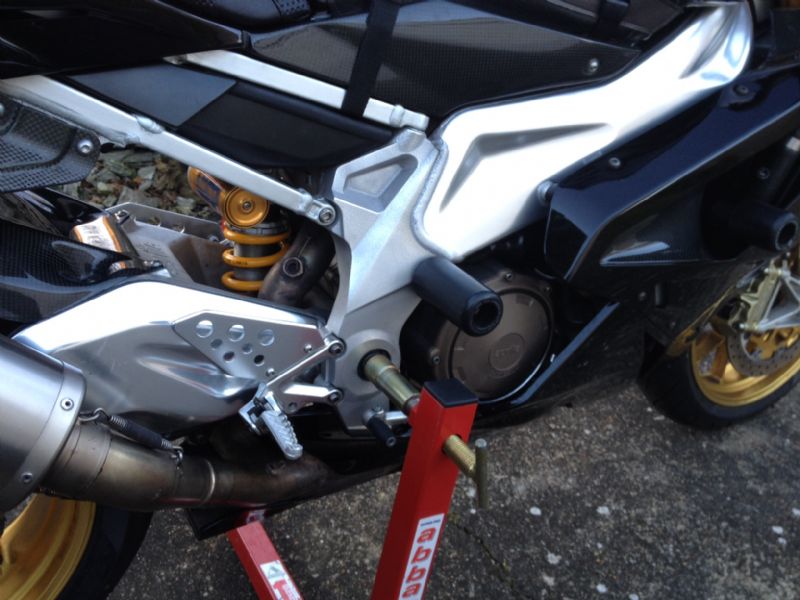 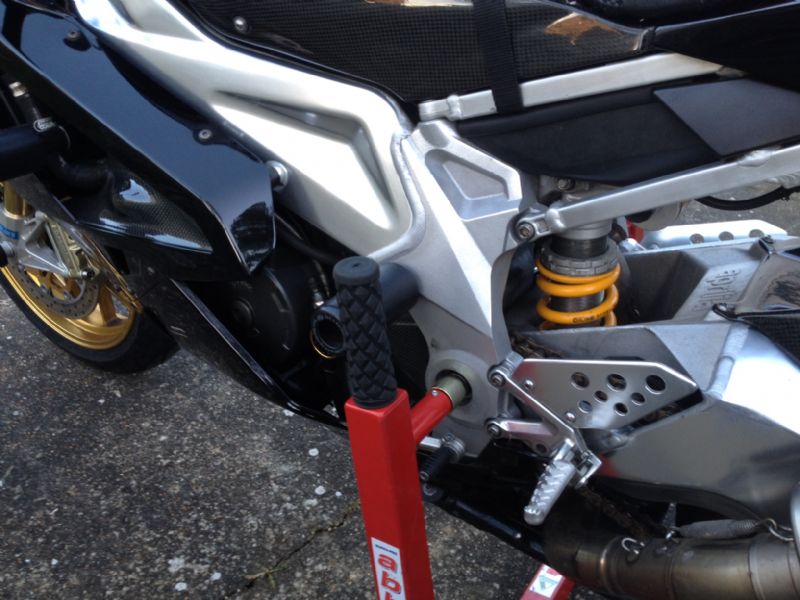 |
||
|
||
|
albrown001
Premium Member Joined: 08 May 2013 Location: Dorset Status: Offline Points: 539 |
Post Options
Thanks(0)
Quote Reply
Posted: 15 Feb 2016 at 18:17 |
|
|
Some bits and pieces that I thought very handy outside of the normal comprehensive bike tools that most of us have.
Comma copper anit-seize copper grease Comma high performance lithium bearing grease Contact cleaner Electrolube contact grease Bottle of blue thread lock. I started using that stick stuff. Convenient to use but goes off too quickly. I ended up going through about 3 sticks. Much better with a bottle Small toque wrench. I use this when building my RC car engines. I found it well handy for the smaller bolts Draper 1/4 drive socket set. I used this more than any of the other sockets sets on the bike Bondus hex drive set. Well handy Castle nut sockets. You don't need that expensive Aprilia frame/swing arm tool. I picked up that advice from the forum 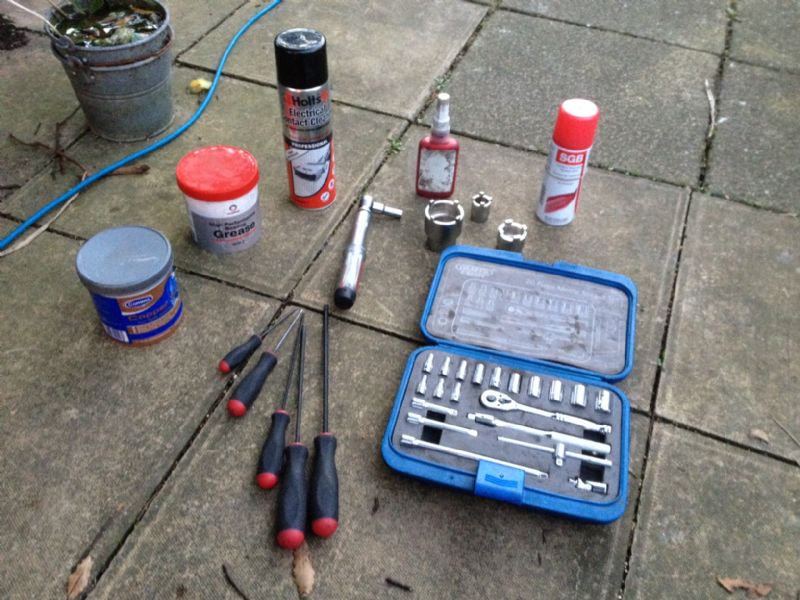 |
||
|
||
|
426hemi
Premium Member owner of the big bore! Joined: 30 Mar 2012 Location: cannock Status: Offline Points: 5795 |
Post Options
Thanks(0)
Quote Reply
Posted: 15 Feb 2016 at 18:22 |
|
|
We have a few of the draper expert 1/4 drive sets at work and they are good especially for the rear exhaust header bolts.
|
||
|
||
|
badapple
Premium Member
Joined: 03 Nov 2014 Location: Norwich United Kingdom Status: Offline Points: 5776 |
Post Options
Thanks(0)
Quote Reply
Posted: 15 Feb 2016 at 18:34 |
|
|
Looks spot on Andy very, very impressive. I'm sure you have inspired a few people to have a go at a full strip down and a nice little touch on the must have tools. Well done
|
||
|
I started out with nothing and I've still got most of it left
|
||
|
||
|
albrown001
Premium Member Joined: 08 May 2013 Location: Dorset Status: Offline Points: 539 |
Post Options
Thanks(0)
Quote Reply
Posted: 15 Feb 2016 at 18:35 |
|
Ha ha mint Thats one of the things I used it for. Its such a handy and well made bit of kit and its also cheap. Plus my small torque wrench fits it.
|
||
|
||
|
albrown001
Premium Member Joined: 08 May 2013 Location: Dorset Status: Offline Points: 539 |
Post Options
Thanks(0)
Quote Reply
Posted: 15 Feb 2016 at 18:44 |
|
Thanks Adam, Having now done it I would recommend people to have a go at it. Especially over the winter period when we are not riding. My bike has done 36k miles so it was good to do to the bike as well. It needed it and I got a lot more confidence in the bike now, even though I haven't ridden it because I know everything is torqued up, thread locked and clean. Cleaning the radiators in the shower with washing up liquid was a good move and wiping down the fans and fan blades. A bit of effort but it can be done. You just got to be brave enough to have a go at it. Taking it apart really is the hardest part. Get a few Chinese and Indian takeaways before you do it though  |
||
|
||
|
legend88
Premium Member 
Joined: 18 Aug 2013 Location: Newcastle Status: Offline Points: 6699 |
Post Options
Thanks(0)
Quote Reply
Posted: 15 Feb 2016 at 21:15 |
|
|
Bike looks much better now, I just don't like that 'gold' frame. Just swap out the gold levers now to finish it off
 |
||
|
||
|
Rybes
Premium Member 
Joined: 07 May 2015 Location: Denmark Status: Offline Points: 1958 |
Post Options
Thanks(0)
Quote Reply
Posted: 15 Feb 2016 at 21:54 |
|
|
that looks so much nicer now the frames silver. god knows what aprilia were thinkin when they came up with that gold idea. looks horrible i think. well done mat ehope ya gave yaself a big pat on the back |
||
|
ive just got my first vtwin and i think i got the right one
|
||
|
||
|
albrown001
Premium Member Joined: 08 May 2013 Location: Dorset Status: Offline Points: 539 |
Post Options
Thanks(0)
Quote Reply
Posted: 15 Feb 2016 at 23:16 |
|
|
Cheers guys
Much appreciated That spare bolt was from the coolant reservoir. I had the panels off again today and ran it up again just for a final check and its the one I took out as my mounting is snapped off anyways. So thanks for that. 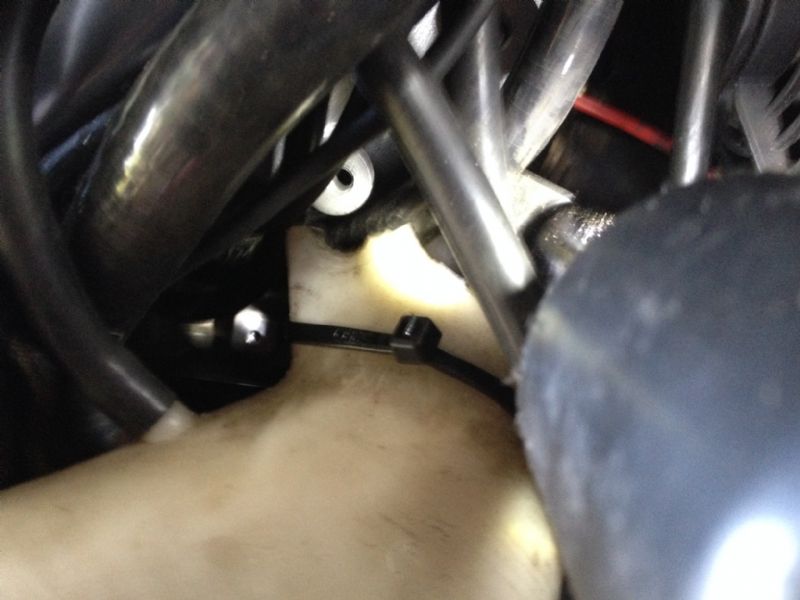 Had to take a bit of oil out but its now between min and max when its hot. I know it probably will creep up a little when it gets hammered but its below max so should be alright. Coolant seems ok and don't think I have any major leaks so stuck it back together and the first warmish day I get I'm going out for a blast.
|
||
|
||
|
albrown001
Premium Member Joined: 08 May 2013 Location: Dorset Status: Offline Points: 539 |
Post Options
Thanks(0)
Quote Reply
Posted: 06 Mar 2016 at 19:52 |
|
|
First day out. Poole Quay today. Freezing my tits off…
 Bike runs really nice. Best its been so far. No vibration compared to before. Reckon that must have been the engine bolts. The G2 throttle tamer is brilliant. Well I think it is. It really mellows out the bike and makes it a lot smoother. This is because it doesn't open the throttle bodies as much as the OEM throttle does below 1/4 turn. I did notice a lack of rush as the bike doesn't take off like it did before. This is because there is no sudden rush like before as the throttle bodies don't open as much initially. But once I got used to this I found it much better. I also found it better for going round corners as you can feed the power in much smoother and better. It really makes the bike much smoother and easier to ride on the road. I think the OEM air box and air filter might be playing a part as well though. It definitely feels stronger with the EVO air box on. I think this is most likely due to the piper-cross air filter over the OEM filter rather than the bigger air box. But I don't trust the foam piper-cross filter for road work, when I hold it up to the light I can see through it. But the bike definitely feels more restricted. But in relation to performance, it more than enough and this is the smoothest the bike has ever ran since I have owned it. Its a completely different bike compared to before. Also really happy with the 10.5 front springs and 105 rear spring. Its so much better and has transformed the bikes handling. I weigh 97kg without bike gear and its a lot better than OEM set up that it was before. It doesn't just corner better but the bike is a lot more stable at speed and didn't move around half as much when I got buffeted by the wind. I also didn't notice any difference in ride harshness either. I didn't feel the springs being stiffer. If anything, the ride is much better now. |
||
|
||
|
davidrsurfer
Premium Member 
Joined: 22 Feb 2011 Location: North Devon Status: Offline Points: 2535 |
Post Options
Thanks(0)
Quote Reply
Posted: 06 Mar 2016 at 20:13 |
|
|
Looks good feller. Bet it was nippy down the Quay today.
|
||
|
Motorcycle friendly self catering holiday apartment Acorn Studio. See us at Air bnb.
|
||
|
||
|
albrown001
Premium Member Joined: 08 May 2013 Location: Dorset Status: Offline Points: 539 |
Post Options
Thanks(0)
Quote Reply
Posted: 06 Mar 2016 at 20:37 |
|
It was alright for a bit. But after 100miles I was really cold.
No it wasn't that bad thanks Mark, now that I have done it. The hardest part is taking the thing apart to be fair. Really glad I did though, it really needed it. But probably wouldn't have attempted it if it hadn't had been for the forum though.
|
||
|
||
|
IanG
Premium Member Joined: 04 Oct 2010 Location: N Wales Status: Offline Points: 10767 |
Post Options
Thanks(0)
Quote Reply
Posted: 06 Mar 2016 at 21:02 |
|
Aprilia seemed to underspring the forks and try and compensate with over harsh compression damping,at least on the Showa's,and if some duc's are anything to go by they just said to Ohlins 'send us something gold and pretty about a metre long'. I've revamped my fork internals now with opened and flowed valve bodies and shuffled shim stacks to relieve the compression and give it some much needed high speed rebound capability. The thing's almost telepathic now by comparison, in spite of being softly sprung so vast improvements can be made easily and cheaply. I think I'll order up a pair of uprated springs though as that will definitely help as I seem to be putting on the pounds at quite a rate. |
||
|
www.apworkshops.co.uk
www.apriliaforum.co.uk www.apriliaownersclub.co.uk Looking forward to the next track day |
||
|
||
|
Peter Harris
Premium Member 
Joined: 22 May 2012 Location: westerham Status: Offline Points: 835 |
Post Options
Thanks(0)
Quote Reply
Posted: 06 Mar 2016 at 22:23 |
|
|
What a great post this has been, and i have enjoyed every page, and what a great ending. All ready for the spring now woo hoo
|
||
|
I'D RATHER A FULL BOTTLE IN FRONT OF ME, THAN A FULL FRONTAL LABOTOMY
|
||
|
||
|
Rybes
Premium Member
Joined: 07 May 2015 Location: Denmark Status: Offline Points: 1958 |
Post Options
Thanks(0)
Quote Reply
Posted: 07 Mar 2016 at 08:46 |
|
|
if you can see air through your filter is it oiled ? if not it might need oiling
|
||
|
ive just got my first vtwin and i think i got the right one
|
||
|
||
|
badapple
Premium Member
Joined: 03 Nov 2014 Location: Norwich United Kingdom Status: Offline Points: 5776 |
Post Options
Thanks(0)
Quote Reply
Posted: 07 Mar 2016 at 09:25 |
|
|
Well done Andy, as Pete says this has been a great post. I'm really happy it's all come good for you and your bike is running so well.
|
||
|
I started out with nothing and I've still got most of it left
|
||
|
||
|
MumboJumbo
World Superbike Star
Joined: 13 Nov 2014 Location: Louth, Lincs Status: Offline Points: 218 |
Post Options
Thanks(0)
Quote Reply
Posted: 07 Mar 2016 at 15:19 |
|
|
Proper good job that, and worth every penny for the way the frame looks now. Mine's in the process of being stripped down, engine out this evening, but I've got the black frame 03 RSVR so won't be getting that polished. But if I wanted it re-powder coating to sort out a couple of scratches on the frame and swinger is there a special Aprilia black I need to use, or is it just black?
My engine's minging too, and it's only done 11,000 miles, so that's the reason for taking it to bits. That and it's too feckin' cold to be riding anything at the moment!!! |
||
|
||
|
albrown001
Premium Member Joined: 08 May 2013 Location: Dorset Status: Offline Points: 539 |
Post Options
Thanks(0)
Quote Reply
Posted: 08 Mar 2016 at 18:47 |
|
To be fair I wan't going to up the front springs but I am glad I did. I didn't feel I had a problem with the front but its not until I got the heavier springs in and the heavier spring on the back that I noticed the difference. It definitely makes a lot of difference if you can get the right weight springs for your weight and riding style. The bike handles much better at all speeds. I just took a gamble and bought what I thought would be about right. I don't notice any difference in ride harshness compared to before, it still feels the same except the bike just handles better. Especially at speed. Its much nicer. Its also easy to change out your fork springs too if you wanted to do it yourself, although I took mine to someone to do while I waited. You just need a couple of special tool, or make your own, but you could do it yourself now that I have seen it done.
|
||
|
||
|
Rybes
Premium Member
Joined: 07 May 2015 Location: Denmark Status: Offline Points: 1958 |
Post Options
Thanks(0)
Quote Reply
Posted: 08 Mar 2016 at 18:54 |
|
|
so mr allborwn the question is what do ya weigh and what springs did ya get ? thinkin of changin mine for somthin a bit stiffer as im a heavy lump
|
||
|
ive just got my first vtwin and i think i got the right one
|
||
|
||
|
albrown001
Premium Member Joined: 08 May 2013 Location: Dorset Status: Offline Points: 539 |
Post Options
Thanks(0)
Quote Reply
Posted: 08 Mar 2016 at 19:01 |
|
I have a lot of experience with foam filters on my RC cars and the piper-cross foam filters that I use let fine dust in to the engines no matter how much oil I put on them. Its the same foam used on the bike filters. To be able to stop fine dust the foam needs to be about an inch thick at least and about 10 times as dense. I know that the bike filter isn't going to get exposed to as much dirt and dust as a large scale RC car will, but still, what fine dust they do get exposed to will pass through even with oil on them. The foam is not dense enough. I have notice a difference in performance (or feel if you like) in how the bike takes off. It did feel much more lively with the Evo air box on and piper-cross filter and it feels more mellow and smoother with the OEM air filter and air box. Its all about performance over reliability and personally my bike is fast enough as it is to not warrant having the Evo air box or piper-cross filter on there and its a lot smoother. If you are not really worried about your engine life or aren't that bothered about any of this then run a foam filter like the piper-cross as I think the bike picks up better with one. I'd just rather have an OEM paper filer on there that I know will stop everything and the bike feels more mellow and is much smoother now compared to before. It nicer to ride.
|
||
|
||
|
Post Reply
|
Page <1 3456> |
 Tweet
Tweet
|
| Forum Jump | Forum Permissions You cannot post new topics in this forum You cannot reply to topics in this forum You cannot delete your posts in this forum You cannot edit your posts in this forum You cannot create polls in this forum You cannot vote in polls in this forum |


 Topic Options
 426hemi wrote: