

|
|
 FAQ FAQ    Register Register  Login Login
|
RSV Mille Various Jobs.... Complete Overhaul |
Post Reply 
|
Page <12345 8> |
| Author | |
Kevrsp 
World Superbike Star 

Joined: 14 Jun 2016 Location: Wicklow Status: Offline Points: 203 |
 Post Options Post Options
") Thanks(0) Thanks(0)
 Quote Reply Quote Reply
 Posted: 05 Mar 2017 at 00:19 Posted: 05 Mar 2017 at 00:19 |
|
Howdy Stegedman,
Tuesday powder opted swingarm is Jond's in the pic on page 1. I have a crowd local to me ready to do mine. I just have to strip it down but before that happens, I want to have all the bits ready to put onto the bike once it is stripped down...... I'm going for the same titanium colour on mine though. I also have the use of a sand blaster so I'll be busy doing the small bits. Very nice end result though.... 
|
|
 |
|
|
Kevrsp
World Superbike Star
Joined: 14 Jun 2016 Location: Wicklow Status: Offline Points: 203 |
Post Options
Thanks(0)
Quote Reply
Posted: 05 Mar 2017 at 00:21 |
|
Tuesday should be "the"........stupid auto complete.....😕
|
|
|
|
|
Kevrsp
World Superbike Star
Joined: 14 Jun 2016 Location: Wicklow Status: Offline Points: 203 |
Post Options
Thanks(0)
Quote Reply
Posted: 09 Mar 2017 at 17:02 |
|
Another few bits to add to the kitty:
New Boots for the lady: 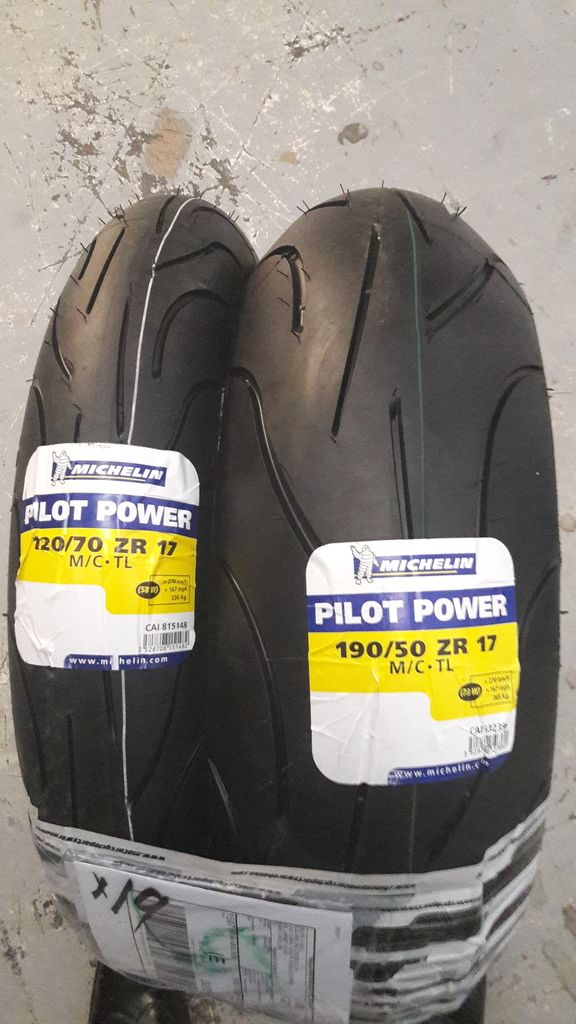 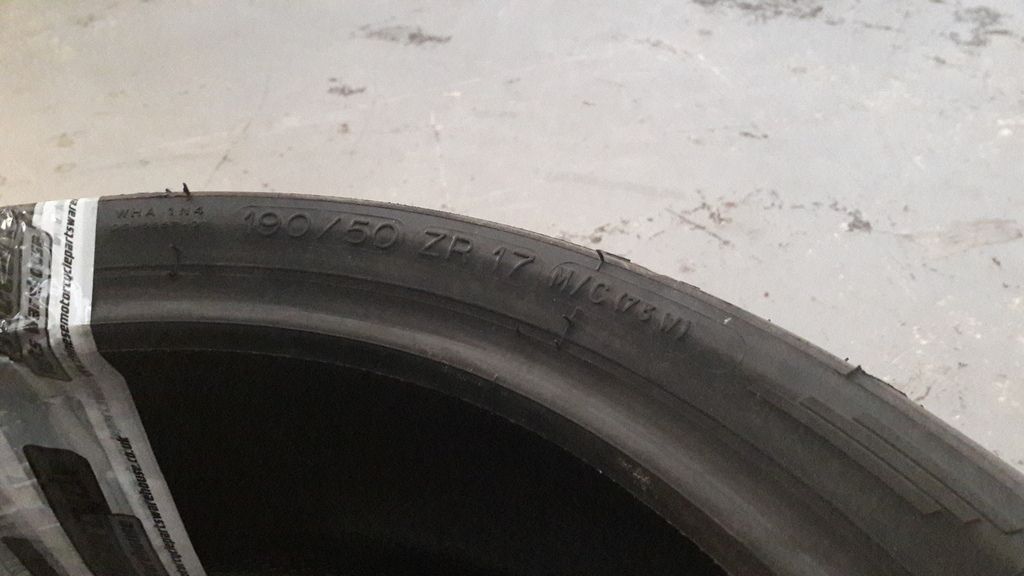 And spares from a Mille R that was breaking on Ebay:   |
|
|
|
|
The Shredder
Moto2 racer 
Joined: 31 May 2015 Location: london Status: Offline Points: 123 |
Post Options
Thanks(0)
Quote Reply
Posted: 10 Mar 2017 at 09:26 |
Am i right thinking these are the cables that go to the battery and the other end goes to the ? starter? Hard route to run/fit? |
|
|
|
|
426hemi
Premium Member owner of the big bore! Joined: 30 Mar 2012 Location: cannock Status: Offline Points: 5795 |
Post Options
Thanks(0)
Quote Reply
Posted: 10 Mar 2017 at 09:33 |
|
Yes main cables and just a bit fiddly but nothing major.
|
|
|
|
|
grumpy
Premium Member 
Joined: 01 Jan 2012 Location: Gloucestershire Status: Offline Points: 166 |
Post Options
Thanks(0)
Quote Reply
Posted: 10 Mar 2017 at 10:11 |
|
Release any cable ties holding the existing cable in place, attach one end of the new cable to the existing cable and carefully pull the new one through as you pull the old one out.
|
|
|
|
|
Kevrsp
World Superbike Star
Joined: 14 Jun 2016 Location: Wicklow Status: Offline Points: 203 |
Post Options
Thanks(0)
Quote Reply
Posted: 10 Mar 2017 at 10:17 |
|
I'm going to do a full pictorial as I do all the jobs on mine so I'll try to include as much as possible to help....
|
|
|
|
|
Kevrsp
World Superbike Star
Joined: 14 Jun 2016 Location: Wicklow Status: Offline Points: 203 |
Post Options
Thanks(0)
Quote Reply
Posted: 19 Mar 2017 at 18:09 |
|
So, it has started.
From This:  To This:  And leaving me with this lot:  OI managed to sand blast the rad upper and lower brackets too so I'll drop those in to get powder coated too when the wheels and shock and swingarm is getting done. The rads are a bit pitted and flakey.  I'm going to clean these both inside and outside and then give the a blast of Simoniz Tough Paint in black. So the plan is to strip the front forks off and try to seperate the stanchions from the lowers so I can get these powdercoated too and then do the swingarm and shock and then drop them all to the company in a box! Glad to get it started....... |
|
|
|
|
Kevrsp
World Superbike Star
Joined: 14 Jun 2016 Location: Wicklow Status: Offline Points: 203 |
Post Options
Thanks(0)
Quote Reply
Posted: 19 Mar 2017 at 18:13 |
|
Oh yeah, can some one tell me what sensor this is please:
  It has a rattle inside it and the Upper on the rubber holder was not pointing up on mine but the bike was not affected I don't think. Ta
|
|
|
|
|
Mr Miller
Premium Member 
Joined: 04 Oct 2013 Location: Ayrshire Status: Offline Points: 1134 |
Post Options
Thanks(0)
Quote Reply
Posted: 19 Mar 2017 at 18:49 |
|
Tilt sensor ?.. hence the rattle
 |
|
|
If you find us in a hedge check the bike first please .. I`m free on the NHS...
|
|
|
|
|
Kevrsp
World Superbike Star
Joined: 14 Jun 2016 Location: Wicklow Status: Offline Points: 203 |
Post Options
Thanks(0)
Quote Reply
Posted: 19 Mar 2017 at 19:53 |
|
Thanks for that. I'll get Googling that tonight to see if it is /was mounted correctly.
Got the hugger off too. Two screws unscrewed and I made a decision before doing it that if the heads rounded on any of them, that a lump hammer and chisel would come to the party. Two rounded so off with their heads. I'll drill and tap them before sending the arm to be powder coated..... |
|
|
|
|
Kevrsp
World Superbike Star
Joined: 14 Jun 2016 Location: Wicklow Status: Offline Points: 203 |
Post Options
Thanks(0)
Quote Reply
Posted: 20 Mar 2017 at 20:40 |
|
Another issue was the blocked drain off pipe that was located under the tank.
There are two screwed in drain nipples with pipes attached to the underside of the tank. One screwed out and one snapped out..... So I got it out plus a little bit of the pipe inside. Man they do get blocked up. I'm going to bond/epoxy the nipples back in and make sure I periodically blow air through the hole/pipe to keep it clear. 
|
|
|
|
|
Quinn
Moto2 racer

Joined: 16 Jun 2016 Location: Annan Status: Offline Points: 158 |
Post Options
Thanks(0)
Quote Reply
Posted: 20 Mar 2017 at 22:40 |
|
Got your work cut out for you there pardon the pun lol, be worth it in the end keep up the good work, thumbs up to tilt sensor thats what it is the arrow should be pointing to sky when you slip it back on the plastic mounting strip, just YouTube fork servicing plenty of step by step videos, they are easier to do than you think just a bit daunting if its your first time.

|
|
|
|
|
Kevrsp
World Superbike Star
Joined: 14 Jun 2016 Location: Wicklow Status: Offline Points: 203 |
Post Options
Thanks(0)
Quote Reply
Posted: 20 Mar 2017 at 23:28 |
|
Cheers Quinn.
I like a challenge. The forks are grand. Its just that I have never separated the stanchions from their feet before. plenty of heat is apparently the trick and make sure the little hex screw comes out too. They rest is simple enough, Its just the time it takes to take it all apart, and put it back together again. |
|
|
|
|
Kevrsp
World Superbike Star
Joined: 14 Jun 2016 Location: Wicklow Status: Offline Points: 203 |
Post Options
Thanks(0)
Quote Reply
Posted: 23 Mar 2017 at 00:36 |
|
More done tonight and it was mainly the swingarm and attempting to remove the needle roller bearings underneath. Not an easy job. To pin was literally welded in the bearings. I ended up heating it and smashing it with a lump hammer:
  I'm going to get a local machines to to get the sleeves of the old needle eollers out. Id just wreck the arm trying to and losing patience with it. out Even the chain itself wouldn't separate so cut it off. Fun and games...... |
|
|
|
|
redratbike
Moderator Group 
The Collector Messiah Joined: 07 May 2008 Status: Offline Points: 16331 |
Post Options
Thanks(0)
Quote Reply
Posted: 23 Mar 2017 at 08:56 |
I washed mine off then gave the tops and bottoms a quick rub down ...used tweezers and a small needle file to assist with straightening all the fins then gave them a shot of paint they looked a hell of a lot better for it and really make a difference to the bike ..then promptly covered them in mesh ha ha ha
|
|
 |
|
|
|
|
Kevrsp
World Superbike Star
Joined: 14 Jun 2016 Location: Wicklow Status: Offline Points: 203 |
Post Options
Thanks(0)
Quote Reply
Posted: 23 Mar 2017 at 09:15 |
|
Lads, I have a simple question I need a firm answer on if possible.
When I removed my swingarm last night, I had one large shouldered bush on one side with the needle bearings but I think a spacer or something dropped out of the other side and I can't find it. Is there defo one large bush and one smaller spacer on these arms? It's just in case I'm looking for something that might not have been there in the first place. Ta |
|
|
|
|
Olie
Premium Member Joined: 13 Nov 2015 Location: Lincoln, UK Status: Offline Points: 307 |
Post Options
Thanks(0)
Quote Reply
Posted: 23 Mar 2017 at 09:49 |
You could take a look on a exploded parts diagram. |
|
|
|
|
Mr Miller
Premium Member
Joined: 04 Oct 2013 Location: Ayrshire Status: Offline Points: 1134 |
Post Options
Thanks(0)
Quote Reply
Posted: 23 Mar 2017 at 09:53 |
|
If you find us in a hedge check the bike first please .. I`m free on the NHS...
|
|
|
|
|
Kevrsp
World Superbike Star
Joined: 14 Jun 2016 Location: Wicklow Status: Offline Points: 203 |
Post Options
Thanks(0)
Quote Reply
Posted: 23 Mar 2017 at 10:11 |
|
True, but if you look at it, the bearings are the last component before the washer and nut so it confused me a little.
|
|
|
|
|
Kevrsp
World Superbike Star
Joined: 14 Jun 2016 Location: Wicklow Status: Offline Points: 203 |
Post Options
Thanks(0)
Quote Reply
Posted: 24 Mar 2017 at 00:18 |
|
so today was interesting.
I got the swingarm off to the engineers to get the old sleeves from the needle bearings out. they will polish the mating surfaces too before I get it back so it will be ready for the new bearings to pop in. I also gave them my exhaust collector and asked them to add a link pipe to make a modded one. I took all the points and notes raised and ended up asking for just one link and in a nice curve rather than a right angle. I also got the wheels stripped down tonight. The front was a piece of piss but the rear broke my heart. I have to make a special drift with a small notch on the top to knock the bearing out. Fecking things were caked in there. 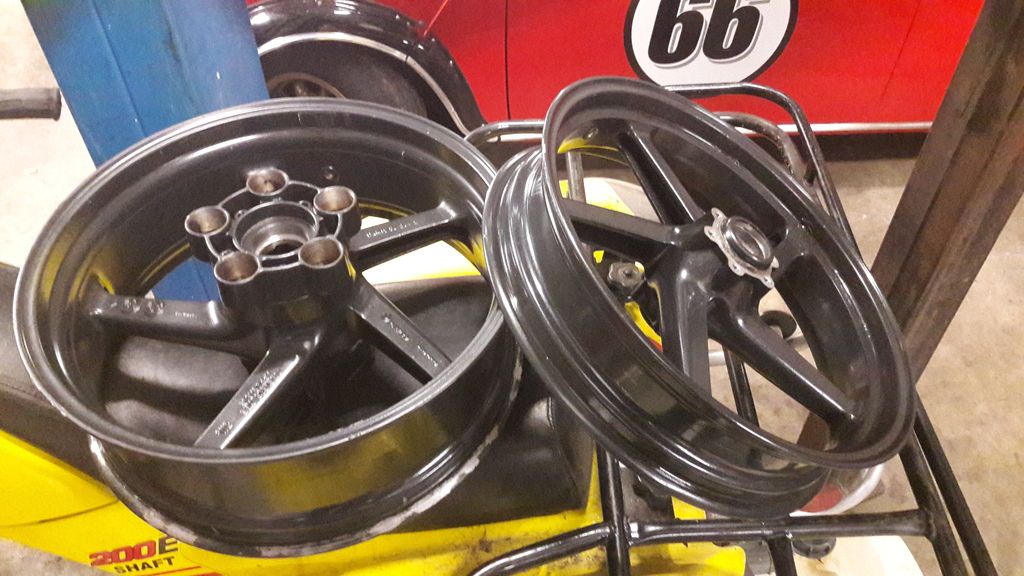 I also got the shock out and apart. The spring is going to go the same colour as the swingarm, titanium and the wheels will be a deep blue. I tried to sand blast the spring but gave up after 10 minutes, that yellow is baked on there.  So off to get powercoated. So the next bit of work will be a few evenings spent doing the wiring and the head light mod that leaves all 3 bulds lit on high beam. I also have new Magnecor leads and I want to clean down the calipers up front. They are looking very sad. I have new banjo bolts and stuff to tidy them up afterwards so the should look ok. The bike is looking a sorry state....  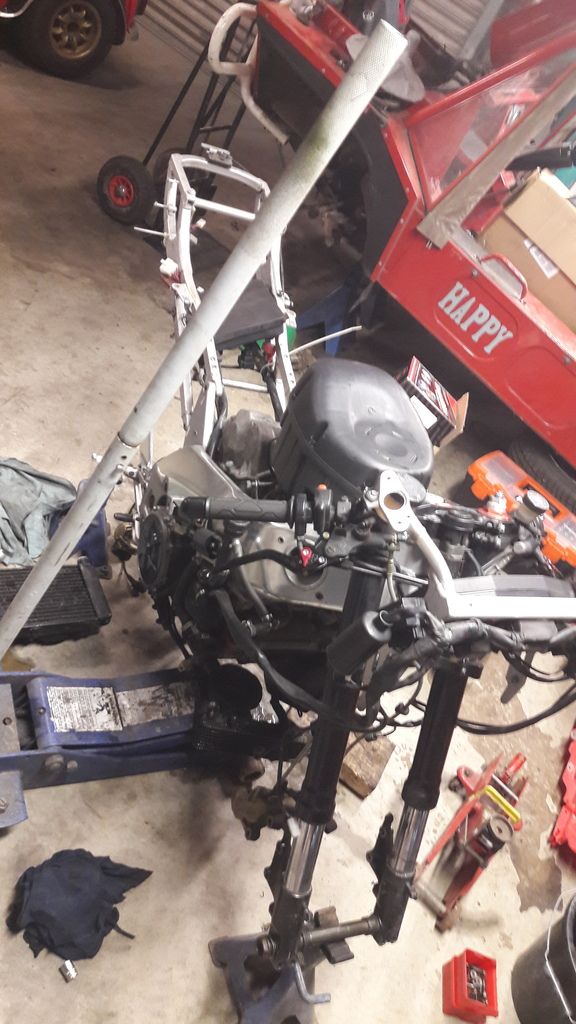 |
|
|
|
|
Stevex
Moto GP Alien 

Joined: 05 Jul 2016 Location: UK Status: Offline Points: 1481 |
Post Options
Thanks(0)
Quote Reply
Posted: 24 Mar 2017 at 11:17 |
|
Bike renovation is good for the soul; you put in all that work and there's no better feeling when the final piece goes back together and you stand back and think,' job well done'.
|
|
|
People say I don't know Jack Sh1t; but I do, he lives next door.
|
|
|
|
|
redratbike
Moderator Group
The Collector Messiah Joined: 07 May 2008 Status: Offline Points: 16331 |
Post Options
Thanks(0)
Quote Reply
Posted: 24 Mar 2017 at 12:49 |
|
|
|
|
|
|
|
|
Kevrsp
World Superbike Star
Joined: 14 Jun 2016 Location: Wicklow Status: Offline Points: 203 |
Post Options
Thanks(0)
Quote Reply
Posted: 24 Mar 2017 at 16:55 |
|
Yep, just the one from the straight to the curve.
I've seen plenty of modded ones and decided on one for now. To tell the truth, the collector was in the boot when I was dropping the swingarm off and on the spur of the moment I gave it to him, so I didn't measure up where the upward link pipe went so just asked him to do the one. I can easily take it off again if proper gains are not noticed but I'll see how I go. |
|
|
|
|
Kevrsp
World Superbike Star
Joined: 14 Jun 2016 Location: Wicklow Status: Offline Points: 203 |
Post Options
Thanks(0)
Quote Reply
Posted: 24 Mar 2017 at 21:08 |
Is there any chance you can take a left and right side pic of this swingarm please? Im nearly sorted with mine to get done and I just want to see how the caliper side and other side looks in this colour. Cheers
|
|
|
|
|
redratbike
Moderator Group
The Collector Messiah Joined: 07 May 2008 Status: Offline Points: 16331 |
Post Options
Thanks(0)
Quote Reply
Posted: 24 Mar 2017 at 21:42 |
|
|
|
|
|
|
|
|
jond58
Premium Member 
Joined: 14 Nov 2013 Location: Selby Status: Offline Points: 2184 |
Post Options
Thanks(0)
Quote Reply
Posted: 25 Mar 2017 at 00:16 |
|
Not been on for a bit, my dads very ill in hospital. I'll get you a photo up
Of the arm in all it's glory over the weekend all been well |
|
|
www.apriliaperformance.co.uk
www.apriliaforum.co.uk www.apriliaownersclub.co.uk |
|
|
|
|
Kevrsp
World Superbike Star
Joined: 14 Jun 2016 Location: Wicklow Status: Offline Points: 203 |
Post Options
Thanks(0)
Quote Reply
Posted: 25 Mar 2017 at 09:33 |
I hope your dad gets better soon.... 
|
|
|
|
|
Kevrsp
World Superbike Star
Joined: 14 Jun 2016 Location: Wicklow Status: Offline Points: 203 |
Post Options
Thanks(0)
Quote Reply
Posted: 27 Mar 2017 at 22:59 |
|
So, got a little more done tonight.
John boy cables were installed.handy enough to route around the bike. It's very true too, the original wires are sh*te in comparisson.....needless to say I'm a happy camper. I went through the coils too and replaced the HTC leads for nice new Magnecor ones. In comparisson, the originals were hard and obviously hardened from years in the heat from the engine. The new ones are a little longer so fit better and a doddle to replace. I bought a kit of about 250 various stainless screws and bolts on Ebay a while back and when I say it was a great buy, its an understatement. They are the exact look of the original stock screws etc that were on the bike so I was able to take off and replace all the crappy rusted ones and replace with nice shiney ones. So all the body work is still at the painters so I can't do anything with the tank and other bits for a while yet. Same with the swingarm. It's still having the old bearing shells taken out. I also got the rear undergrad swapped out for the black one I bought. It will go a lot better with the new paint work.   
|
|
|
|
|
bladebod
World Superbike Star
Joined: 08 Nov 2016 Location: Portsmouth Status: Offline Points: 216 |
Post Options
Thanks(0)
Quote Reply
Posted: 28 Mar 2017 at 13:34 |
|
looking good, I have its twin in my garage at the moment lol...
|
|
|
|
|
Post Reply
|
Page <12345 8> |
 Tweet
Tweet
|
| Forum Jump | Forum Permissions You cannot post new topics in this forum You cannot reply to topics in this forum You cannot delete your posts in this forum You cannot edit your posts in this forum You cannot create polls in this forum You cannot vote in polls in this forum |


 Topic Options
 Johnboy wrote:
